Finishing the ICF Basement Interior
I realize it has been awhile since I updated you on phase 2 of our ICF house building. Now, don't think we have been lazy and not working - we have! Been working that is. Here is what we have been working on, on our ICF basement.
For a chronological listing of our building projects with ICF (or insulated concrete forms), be sure to look through the ICF Building Index.
For those of you who want to catch up on what I am talking about, see ICF Building Index which gives you a chronological list. Briefly, we are building our own home overlooking the vineyard using ICF Blocks - Insulated Concrete Forms. ICF's have a very high insulation value and are super easy for do-it-yourselfers like us! They fit together like big legos and are then filled with concrete.
I won't bore you with a lot of mumbo-jumbo but I will show you pictures of what is going on. After harvest was over and the vineyard put to bed for the winter, we got to work on phase 2 - the ICF basement expansion.
Putting in Joists
The first step was putting up the joists for the "roof", which will be the floor for the next story.
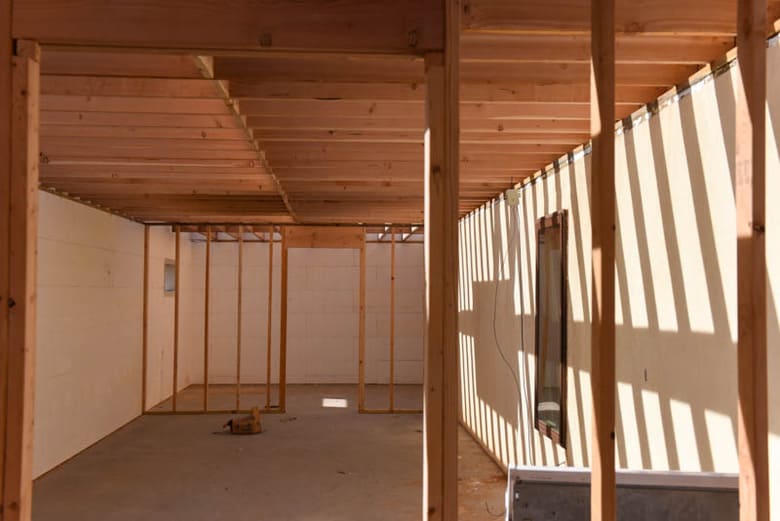
As you can see, the icf basement got progressively darker as the rafters were put on.
Here Comes the Roofing
Next came the roofing (or subflooring for the first floor.) We used tongue & groove OSB (oriented strand board). It is a pressed-glued type board, but I just call it plywood.
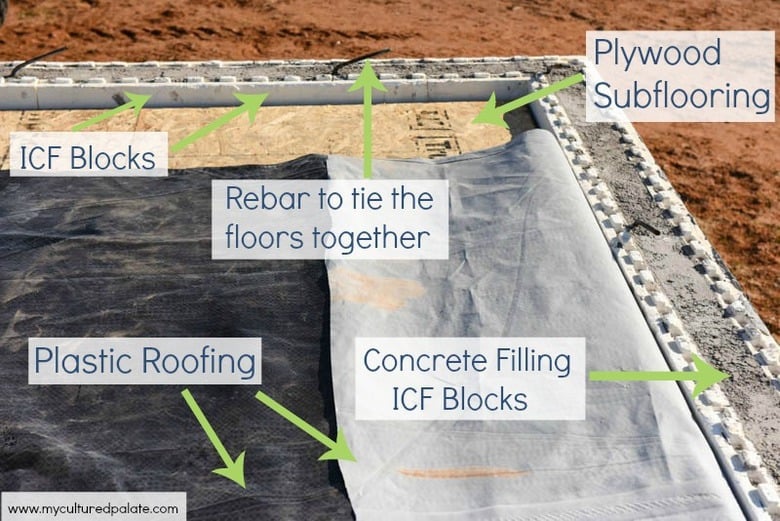
Then came the temporary roof (since we plan to start the first floor ASAP). We laid down foil backed 3/4 inch polystyrene foam board and covered it with some real tough plastic. We had used TPO (Thermoplastic Olefin) on the original basement - these were large pieces leftover from a professional roofer that John's brother, Joe, got for us. For this expansion we could not find any free or cheap TPO, so we opted to use some EPDM. The EDPM came from the huge temporary ponds used for the fracking wells around us. So unless we punctured it, it should be pretty water tight! After all, it only has to last another year - hopefully!
Now for Finishing the Interior
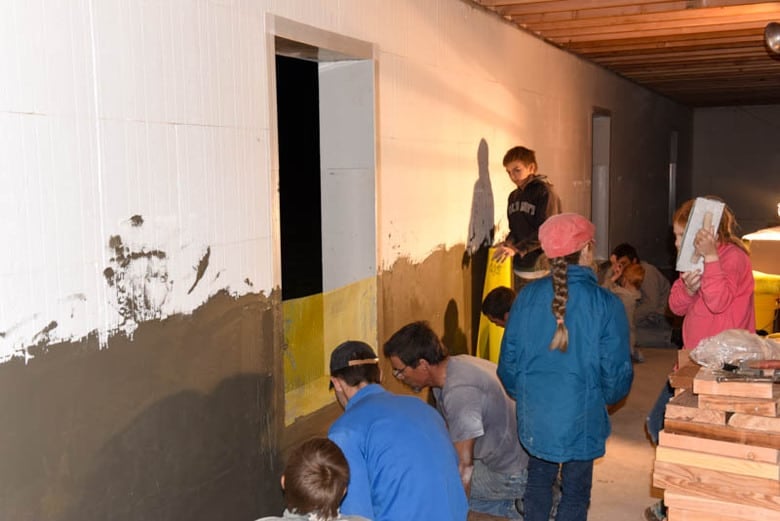
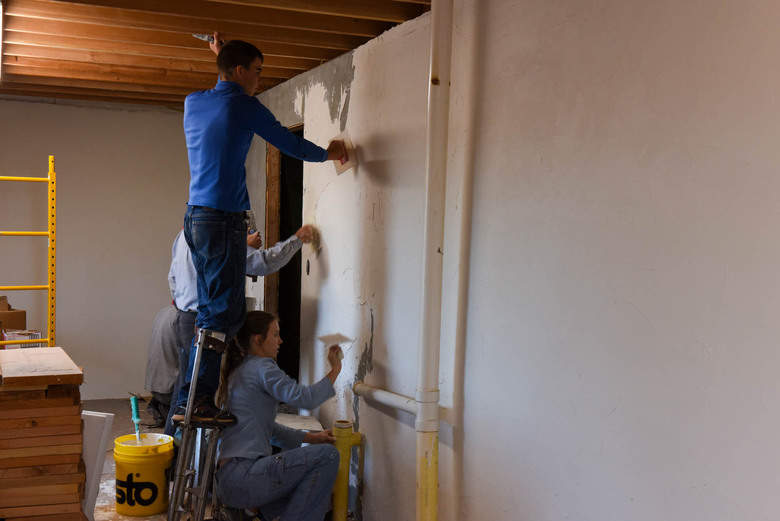
Once the roof was securely put on, we focused on finishing the interior. First came the basecoat for the EIFS which is a polymer modified cement coat with fiberglass mesh (yellow bellow) embedded in it. You can see the detail of each step in 3 Steps to DIY Stucco.
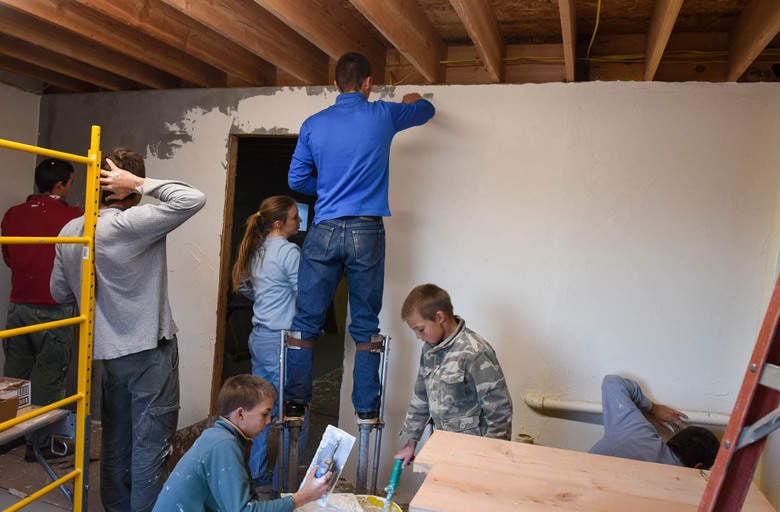
Since these are inside walls, we want a smoother texture than we have previously used for exterior walls. So, we are trying a new product by Sto which is called Freeform. As with other STO products, Freeform is tinted and you determine how much texture is left as you apply it. We had 3 people putting on the Smooth Coat with trowels and 3 people coming behind texturing and smoothing the walls.
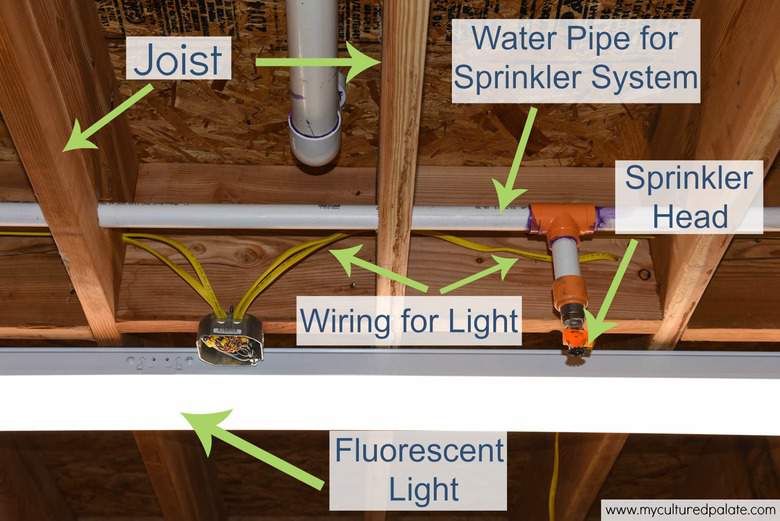
The wiring is finished for the lights and receptacles as is the sprinkler system. John has put a fire sprinkler system in each of our houses - not necessarily to save the structure but to buy time and save lives in case of a fire. The photo below is looking up at the ceiling so you can see the different parts.
Our goal is to move into the expansion by Christmas - it will be close!