ICF Blocks – Walls Stacked and Filled with Concrete
 For a chronological listing of our building projects with ICF (or insulated concrete forms), be sure to look through the ICF Building Index.
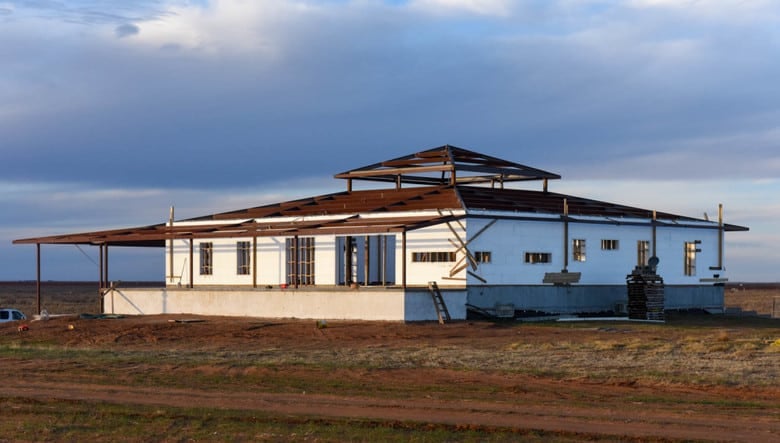
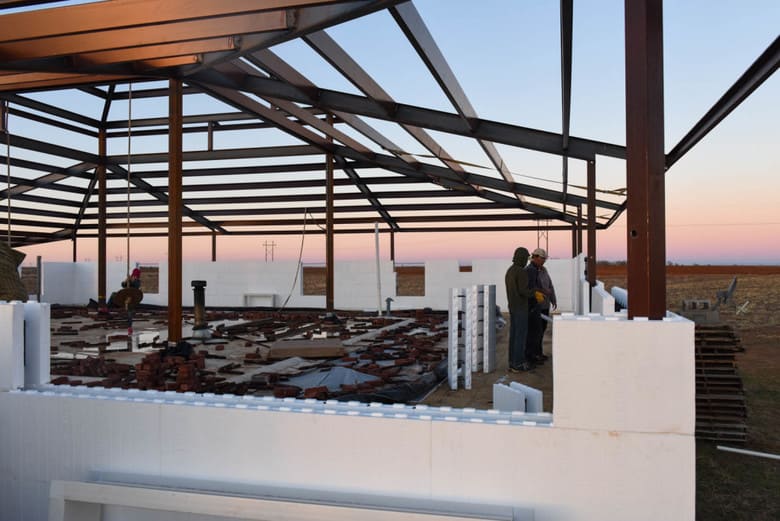
This is how our ICF block walls look now that they are stacked and filled with concrete. ICF blocks are insulated concrete forms that stack like legos and are easy for DIY’ers like us!
But, all is not bliss…
The best laid plans of mice and men…
Oh, I’ll just get right to it…
Last week I was so excited that the steel roof and supports were actually finished and we were once again making progress on our house – and, I still am – but things took a little unplanned twist!
We had planned to stack the ICF blocks Monday and Tuesday since the steel was finished, fill them with concrete Wednesday and the roofers would put the metal roof and be done by the end of the week. There was just one little hiccup – rain.
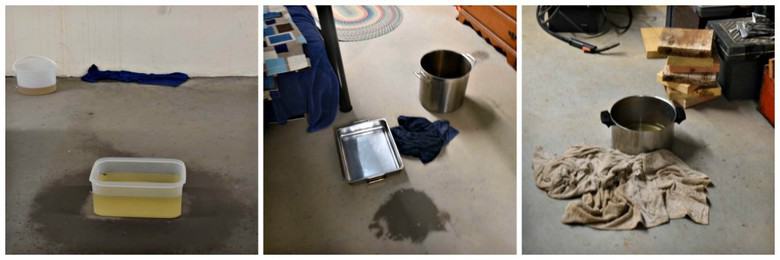
If you remember, the temporary roof over the basement is TPO (thermo plastic olefin) which is a commercial flat roofing product. We had cut it so the steel would sit securely on the supports underneath which left the sub-flooring exposed to the weather. Had we had sunny weather, this would not be a problem. But, we had rain!
John and the boys taped plastic to cover the openings but we still had water leaks. In fact, I woke up in the night to hear rain in the boys’ room – that is not what you want to hear at 2 am! Thankfully, no real damage was done and it was just the inconvenience of mopping up water.
We will just call it character building and leave it at that!
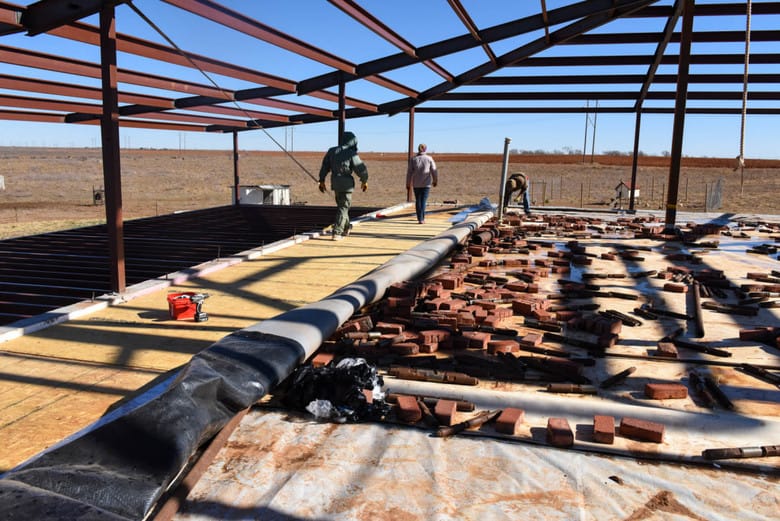
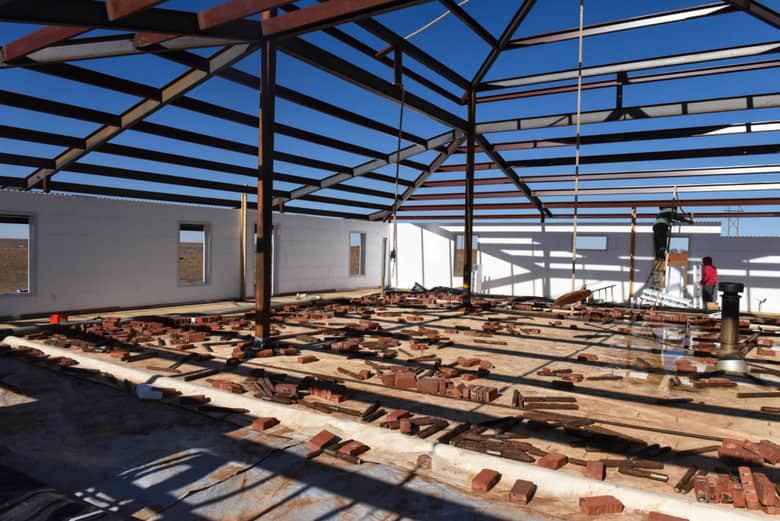
 Finally the weather cleared and we could begin preparation for stacking the ICF blocks. The first step was to roll back the TPO along the edges of the roof exposing the ICF blocks of the basement walls. We also left enough room for scaffolding which would be used to reach the top of the walls and for filling them with concrete.
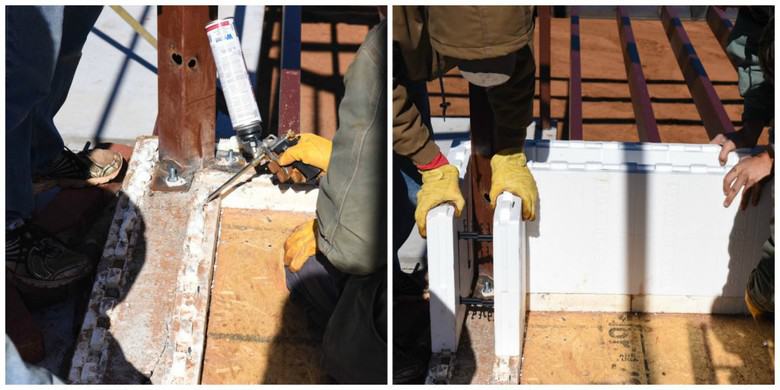
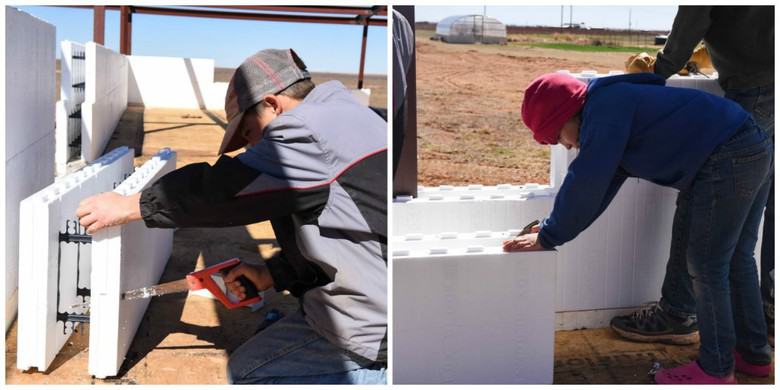
 Once the top of the ICF basement walls are exposed, the blocks were cut as needed to fit around the steel posts, glued into place (first photo below) and then pressed into place (second photo).
 It was very cold and windy the first day but we managed to get almost halfway up the walls. Each ICF layer around house is called a “course” and they go up very quickly. Our walls are going to be 10 ft. tall which is 7 1/2 courses.
The beauty of ICF blocks is the eases in which they go up – they are like legos for adults. Only the first course has to be glued. You cut to fit, snap together and continue until you are done! Cutting around the steel posts, windows and doors is more time consuming and slows down the progress. Still, it is much quicker than building with wood and has a terrific insulation value.
 Even the younger children got in on the action. “Daddy, can I cut some” was a reoccurring phrase!
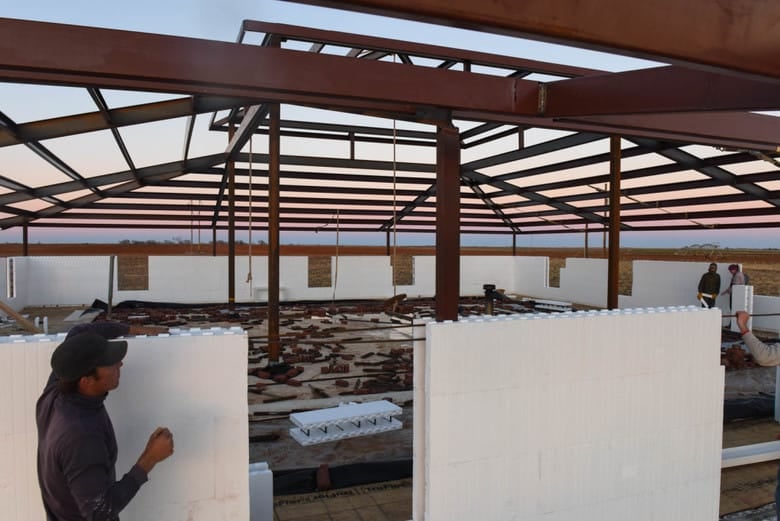
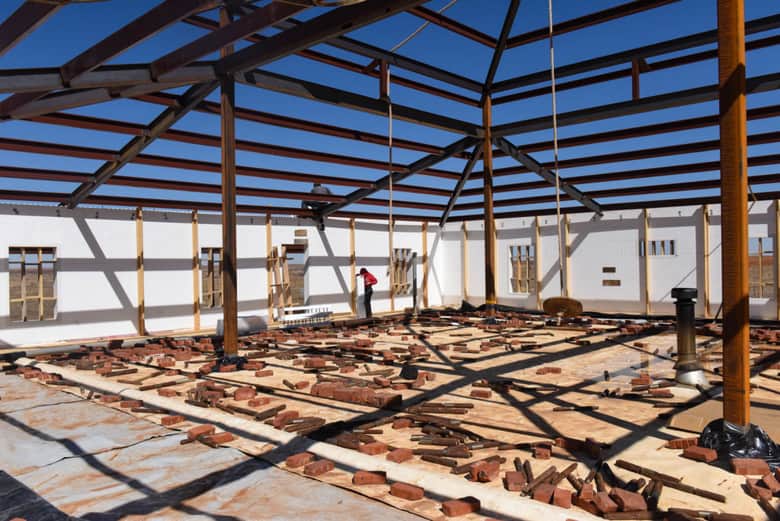
 You can see in the photo below, the sun is beginning to set and the house is really taking shape at the end of the first day.
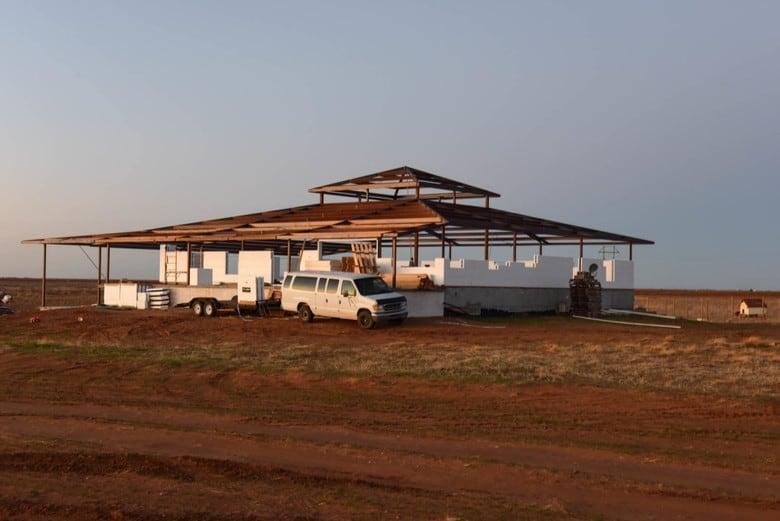
 Standing back, it is really coming together!
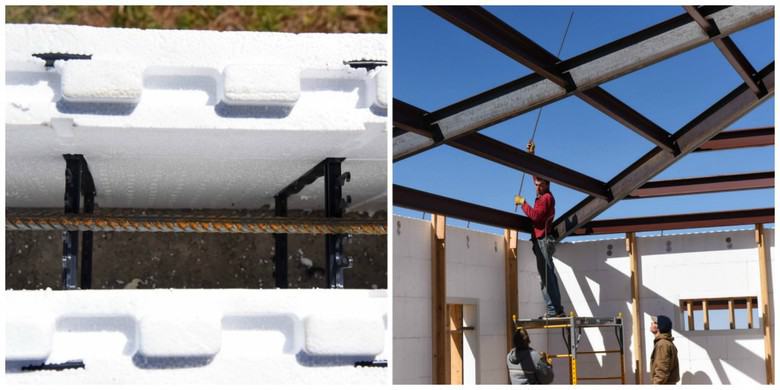
 The second day of stacking the ICF blocks was not nearly so cold and we began the day with v-buck which stands for vinyl window buck. V-buck is snapped together to fit the size window you will be using.
On the left, in the photo below, you can see a 3×5 ft window. On the right, the boys and John are fitting the v-buck for a bay window which will be in the dining area. The v-buck fit very securely around the ICF blocks.
You can also see the hole that has been cut in the bottom of the v-buck on the left – that makes it easier to be sure the area below the window is filled with concrete.
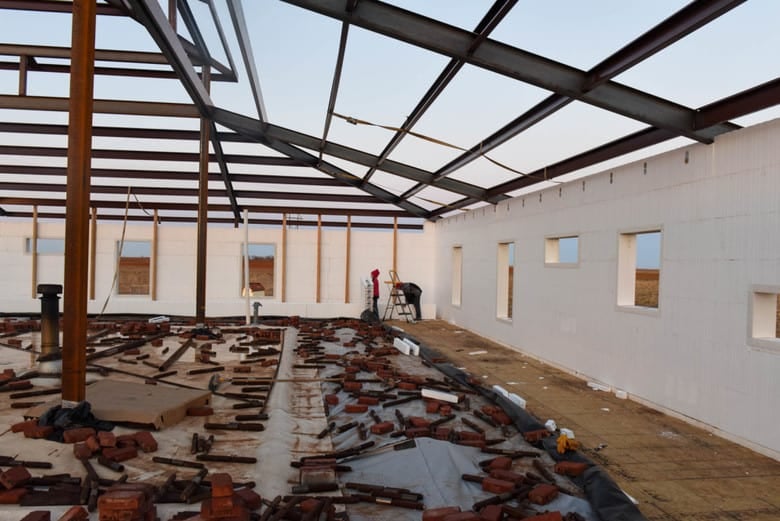
 After another full day of stacking ICF, we are just about ready to stop for the day.
 Before stopping the second day, some wood braces were screwed into place which you can see on the back wall. The wind was picking up a bit and the last thing we wanted to wake up to the next morning was our ICF blocks being blown around west Texas!
 No matter how hard we work and how much we get done, we always feel as if we are scrambling to finish before the concrete trucks come! The morning of the third day, we were up early finishing the last course around the top and bracing windows, doors and walls.
Rebar is put into the wall every third course. You can see below (left) that the ICF blocks have black plastic braces that hold the rebar and also give support to the finished wall. Rebar is also placed vertically from the top down into the wall to help tie it all together giving more strength. On the right, you can see the top of the rebar sticking out above the top of the ICF blocks as another long rod is put into place.
 With the anticipation of the pour, we did not take the time to stop for lunch but I had a pot of Spicy Beans and Rice ready and everyone took turns running downstairs and grabbing a bowl.
 The concrete pumper truck arrived around 12:30 pm and set up. The first concrete truck arrived about 1:15 pm. And, the fun began!
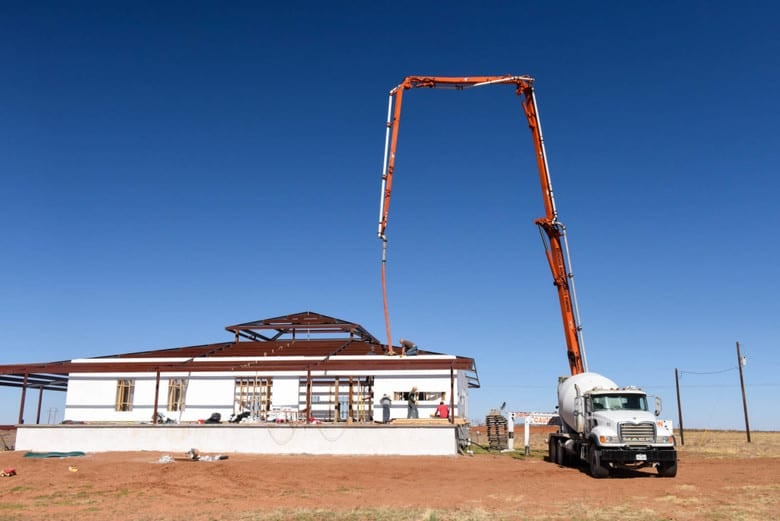 If you have never seen a pumper truck, it really is amazing. It pumps the concrete up that long hose and then down to where you direct it. There was a four inch reducer on the end which helped John ring the ICF blocks rather than spill concrete over the sides and make a mess.
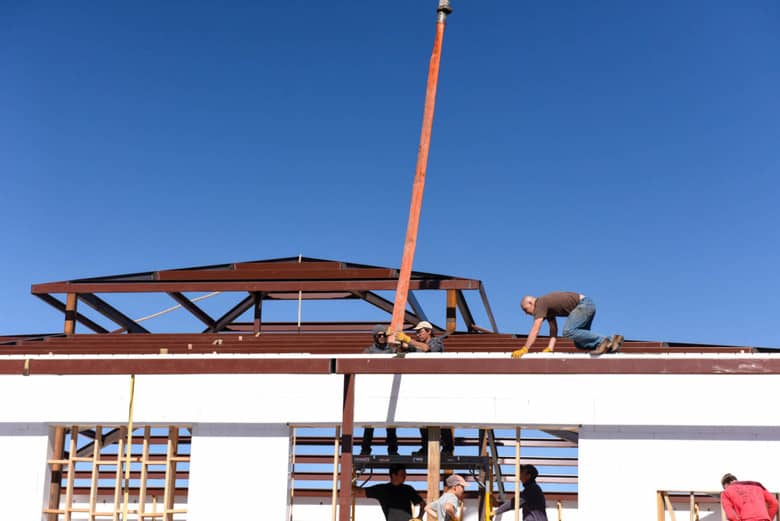
The pumper truck operator has a handheld device with a bunch of toggle switches to control the arm, hose and concrete. This operator stayed on the scaffolding with John as others pushed them around the walls. Ideally, you fill the wall in thirds which allows the concrete to set up a bit and harden before the next layer is added.
 We were a bit concerned because the first truck’s load was wet and soupy but we thought we would give it a try – big mistake!
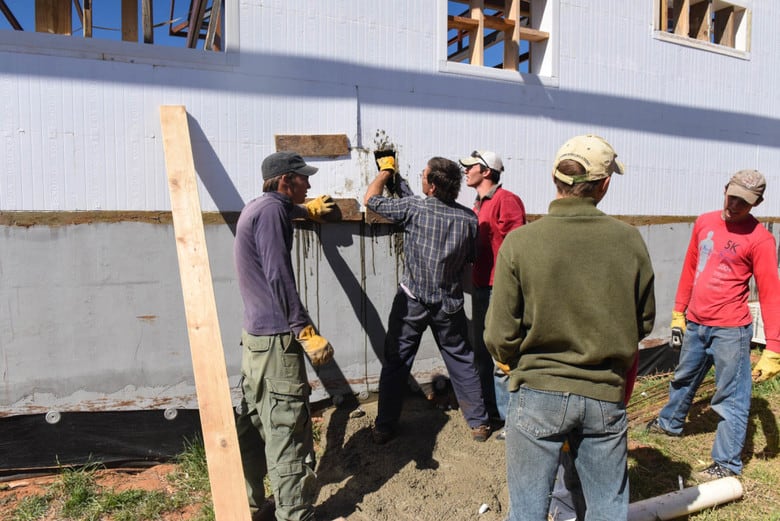
Keep in mind, this is not our first ICF building and we have never had a big blow out – meaning, the concrete causes the ICF block to bulge and finally blows out the side – until now….
Notice the pile of concrete on the ground that they are standing in!
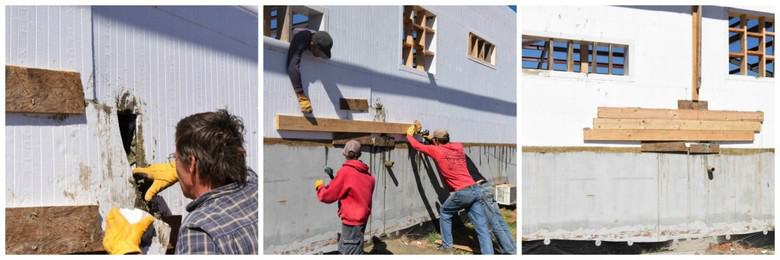
 Below you can see the process of patching or “scabbing” the ICF block. In the far left photo, John is cleaning out the concrete so the ICF block can be put back together. In the center the boys are straining to screw a board across the blowout. And, in the far right, you can see the finished scab. Beautiful isn’t it?
 Well, that was just the beginning! We had two other major blowouts (plus other bulges) that I could not take photos of – seeing one is enough, besides, I was busy shoveling up concrete and using the spilled mess to fill up under windows!
After a little while, we solved the puzzle as to why this was the worst pour we have had. Remember the black plastic supports in the ICF blocks I showed you earlier? Well, to fit the ICF blocks around the steel posts of the roof structure, we cut some of those supports, pulled the blocks apart and placed them around the posts. This weakened the blocks! Once we realized what the problem was, the boys put lots of scabs on the areas we knew would be weak.
The scabs helped tremendously but I think everyone was anxious that it would blow again! Thankfully, all attitudes were good and everyone worked together well.
Hamburgers were planned to celebrate the finish but by the time we were done (after 8 pm), everyone was too tired to enjoy them. So, grilled cheese sandwiches and a movie were our celebration.
 Next, the roofers come back and put the metal roof on!
It is all shaping up very nicely. Rain always has a way of ruining the best made plans!
Thanks for the encouragement, Darlene! Hopefully, the roofers will get the metal on before anymore rain comes our way!